Hey there, developers! 👋 Melissa here, and today I'm diving into the world of webhooks in Langflow. Whether you're a seasoned coder or just getting started, this guide will walk you through setting up and using webhooks in your Langflow projects. Let's get started!
Setting Up the Webhook Component
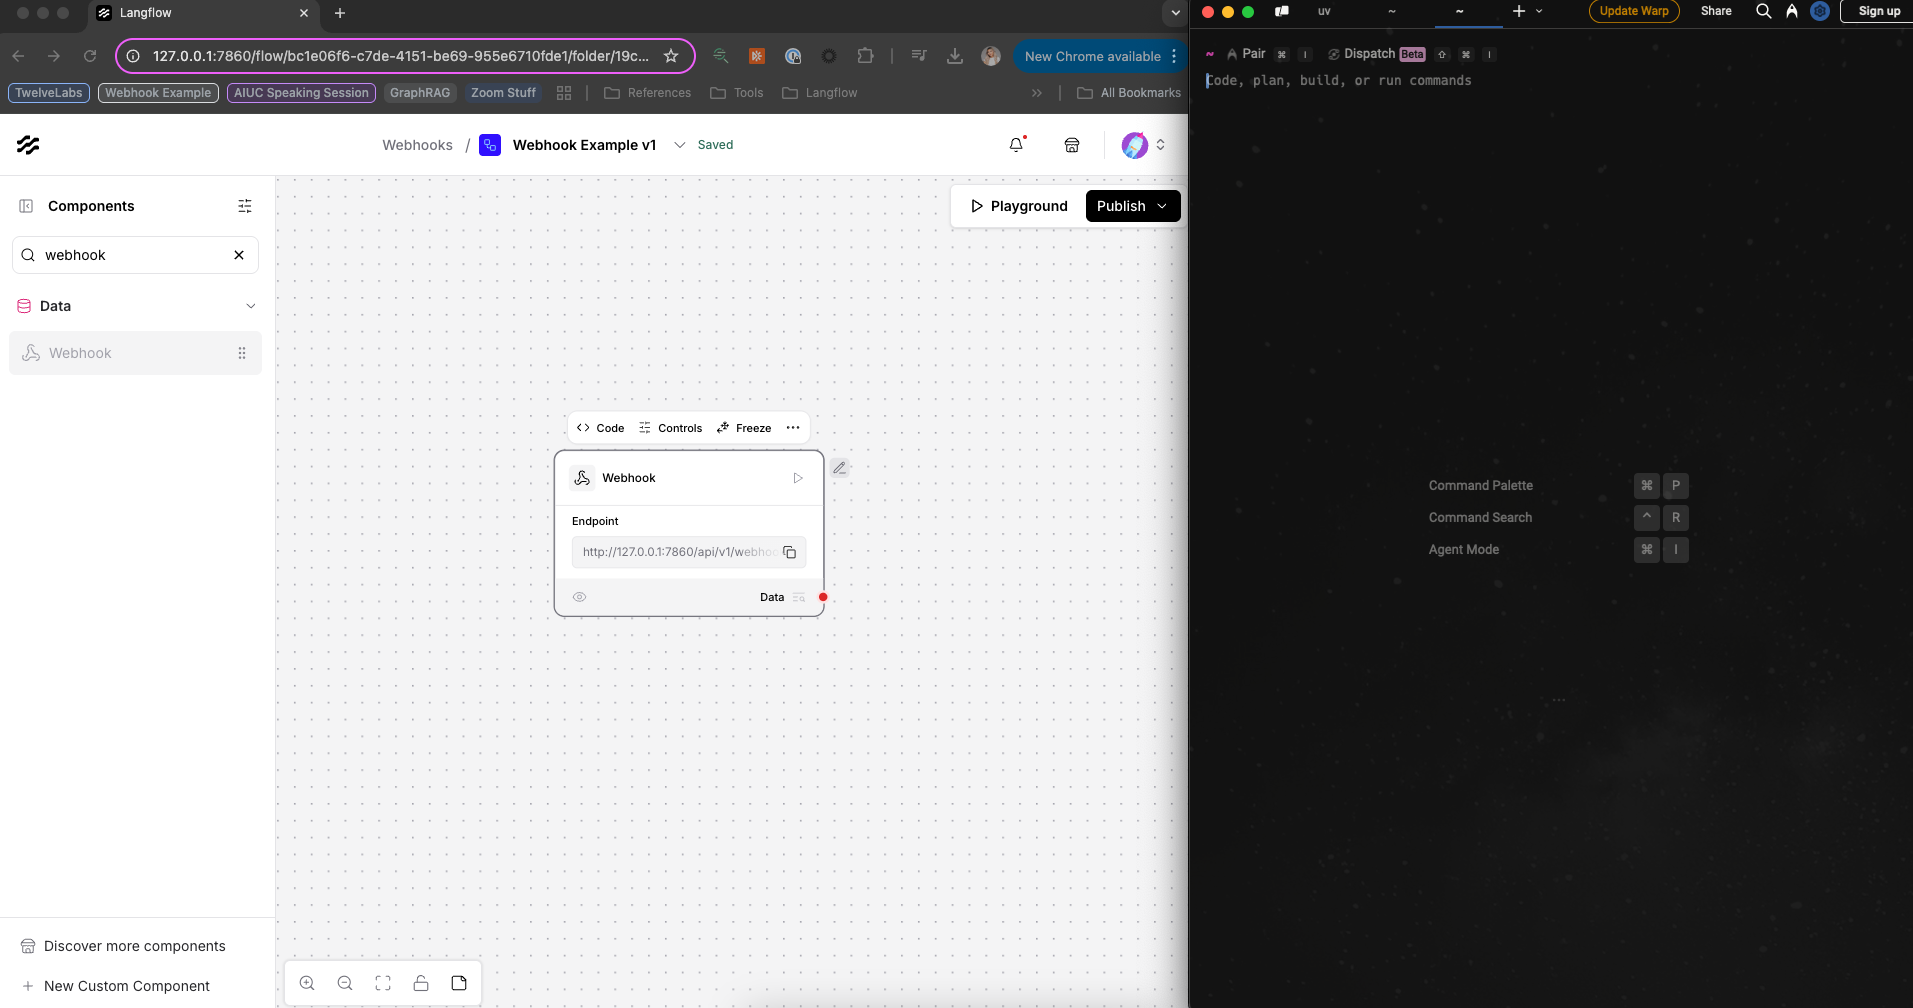
For initial setup, we need Langflow (OSS or Desktop) and a terminal. First things first, let's bring in the Webhook component to your Langflow workflow.

This component exposes an endpoint to your Langflow instance. Think of it as a doorway to your workflow.
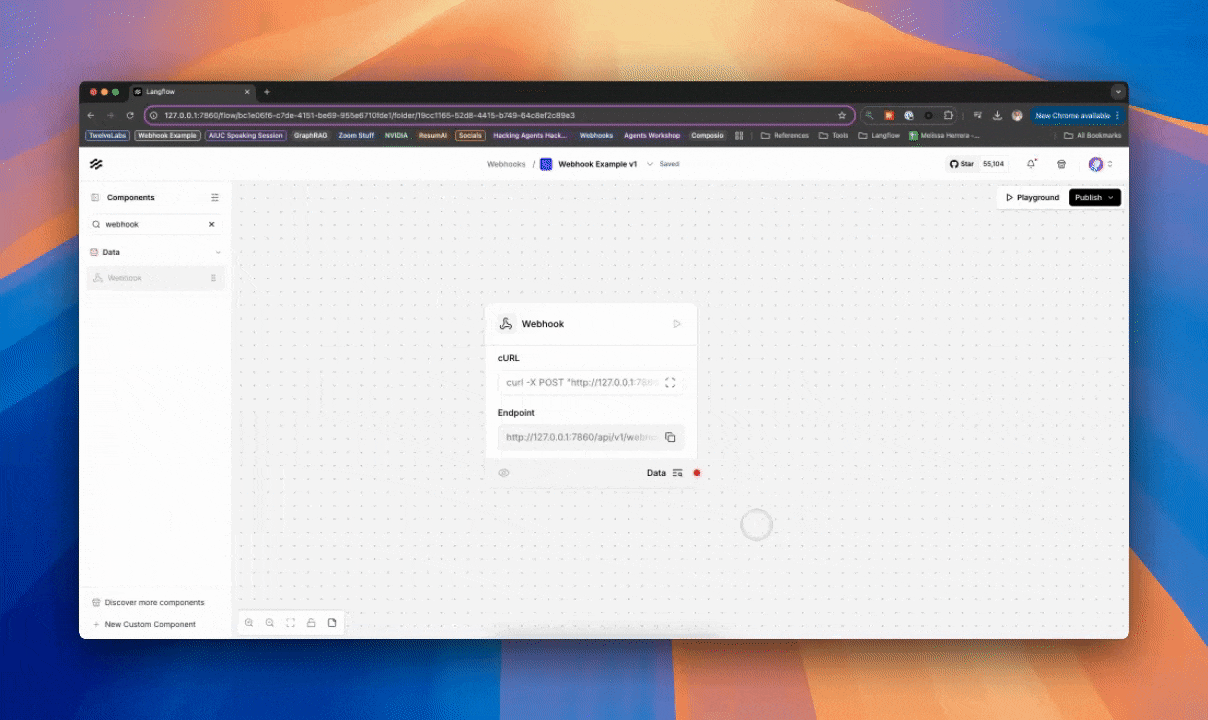
Go into the “Controls” of the Webhook component and obtain the cURL command.

To test this setup, we'll send a POST request pointing to the Langflow webhook endpoint and flow ID. Copy and paste the cURL command in your terminal.
curl -X POST \
  "http://127.0.0.1:7860/api/v1/webhook/bc1e06f6-c7de-4151-be69-955e6710fde1" \
  -H 'Content-Type: application/json'\
  -d '{"any": "data"}'
Once you see the success message in your terminal, you know your data has made it through to the Langflow workflow.
{"message":"Task started in the background","status":"in progress"}We can confirm that the data was sent successfully by going into our Webhook component, and inspecting the output.
Simple example
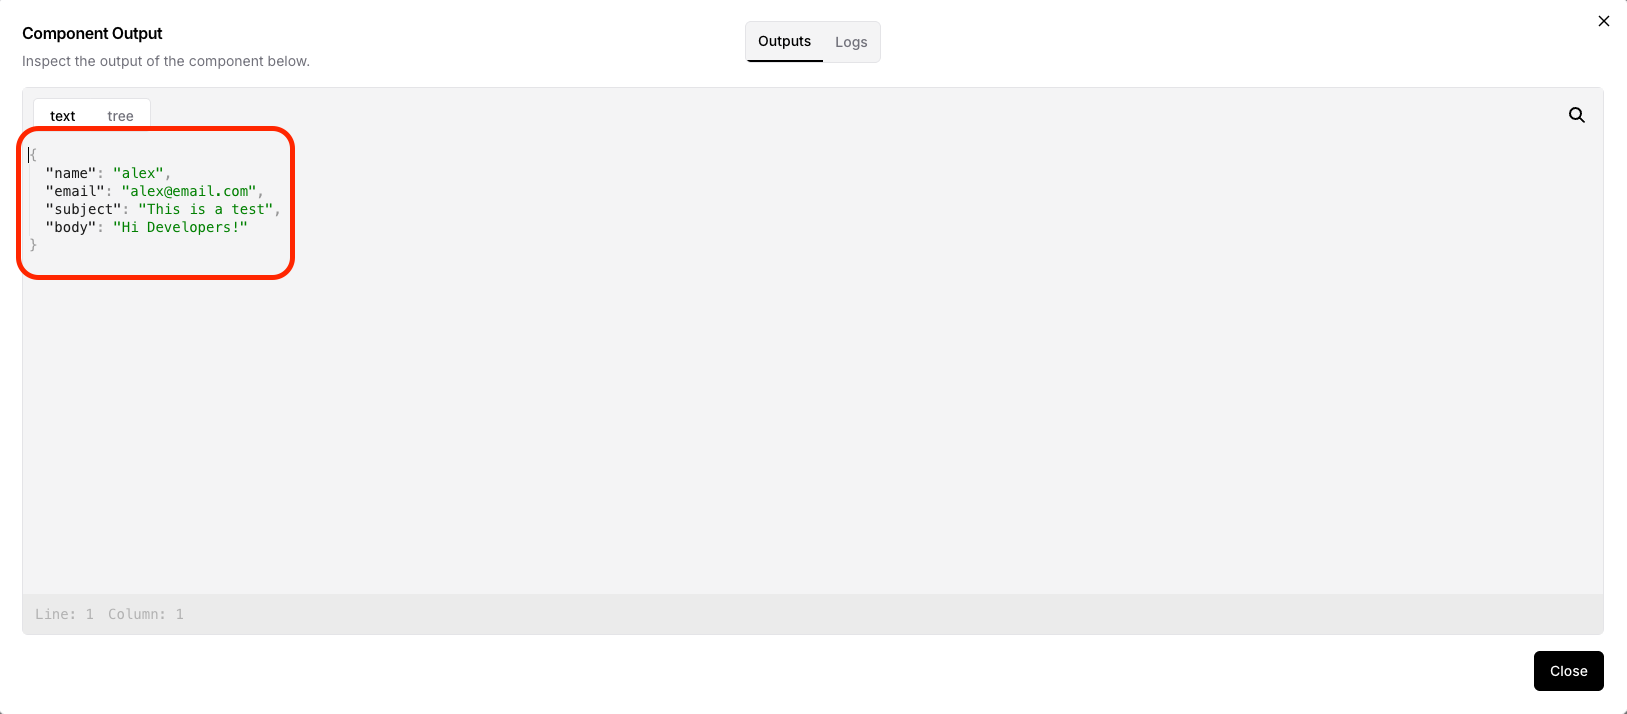
Now, let's add more data to our POST request: a name, email, subject, and body.
curl -X POST \
  "http://127.0.0.1:7860/api/v1/webhook/bc1e06f6-c7de-4151-be69-955e6710fde1" \
  -H 'Content-Type: application/json'\
  -d '{"name": "alex", "email": "alex@email.com", "subject": "This is a test", "body": "Hi Developers!"}'
Send this command in your terminal and make sure you see the success message. Inspect your Webhook component in Langflow, and notice the data comes through in JSON format.
Great! Now how do we use this data in our workflow? Enter the Parser component!

The Parser component helps extract specific fields from the incoming data using the “Template” field. Define a template using field names like name, email, subject, and body like this:
Name: {name}
Email: {email}
Subject: {subject}
Body: {body}
Anything that is in a curly bracket will be recognized as a column value from a Dataframe object or key value from a Data object.
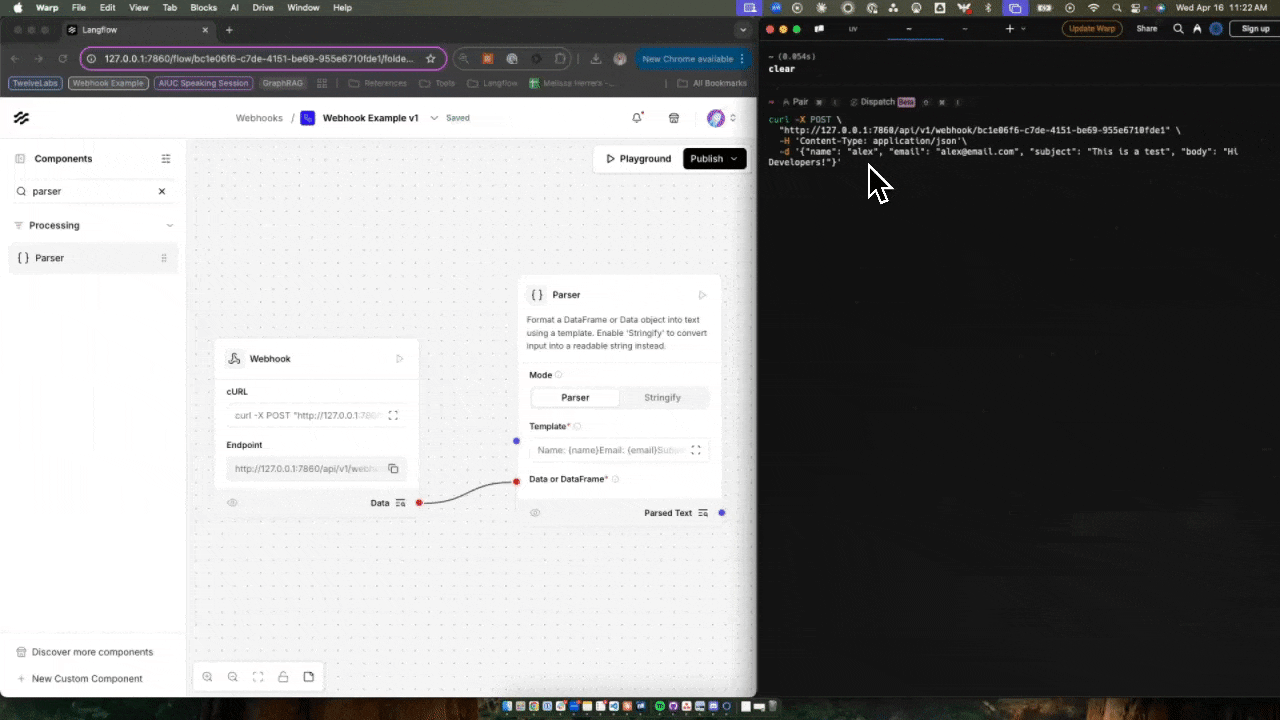
Connect the output of your Webhook component to the Data or DataFrame input of the Parser component. Send the cURL command again, inspect the output, and voilà—you've got your data! 🔍
🌐 Calling webhooks from your application
Now that you have your webhook set up and tested using cURL, let's discuss how to call this from your application or external service. This is where your app can dynamically interact with Langflow by triggering specific flows.
From your application:
-
Define the webhook URL - Your webhook URL, provided by Langflow, acts as an endpoint that your application can call. This URL is unique to your flow and is necessary for triggering the workflow.
-
Integrate the webhook call - Within your app, use an HTTP client to make a POST request to the webhook URL. This could be part of your backend logic or a serverless function.
-
Implement in your code -
import requests
# Example of sending data to the webhook
webhook_url = "http://127.0.0.1:7860/api/v1/webhook/bc1e06f6-c7de-4151-be69-955e6710fde1"
data = {
    "name": "John Doe",
    "email": "john.doe@example.com",
    "subject": "Greetings",
    "body": "Hello, this is a test message!"
}

response = requests.post(webhook_url, json=data)

if response.status_code == 200:
    print("Webhook call was successful!")
else:
print("Failed to call the webhook.")-
Monitor and adjust - Ensure that your application handles the response from the webhook call. You may want to log success or failure, retry failed attempts, or handle errors gracefully.
From an external application/website:
-
Identify the external service - Choose an external service that supports webhook integration. This could be anything from a CRM to a notification service to an application integration platform like Composio.
-
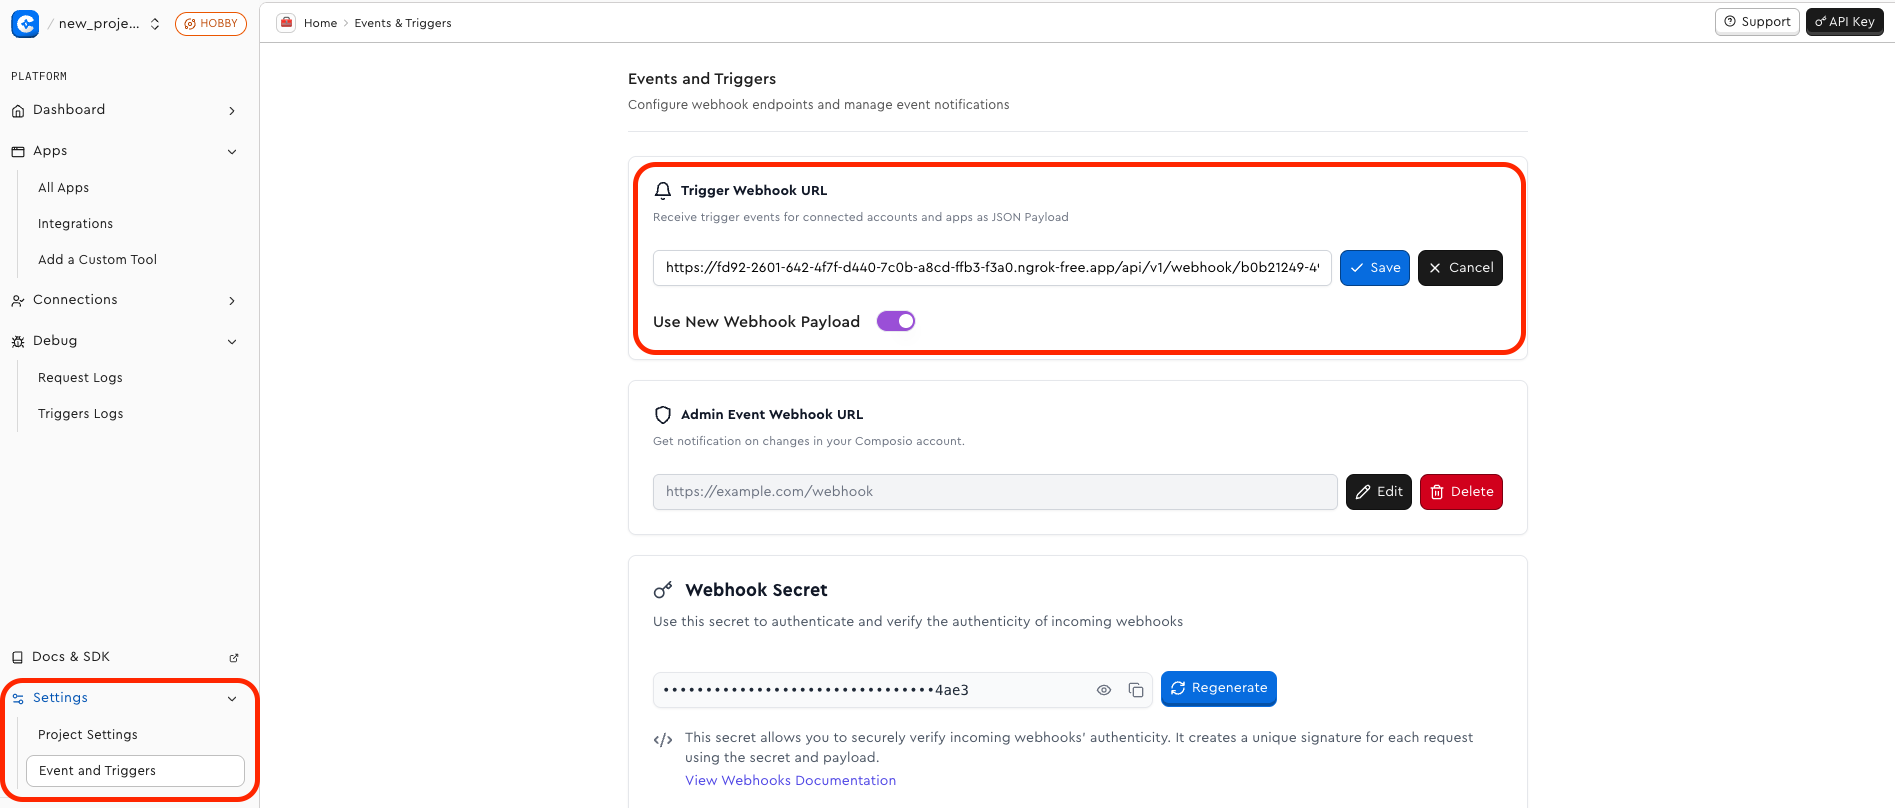
Generate your webhook URL - In Langflow, your flow comes with a unique webhook URL. However if you are running OSS or Desktop, you cannot access this URL externally (“localhost” is not available from the internet). For this, you would need to use a service like Ngrok or Render to deploy your Langflow instance to.
-
Configure the webhook in the external service -
-
Navigate to webhook/trigger settings - Access the settings for webhooks in the external service's dashboard.
-
Enter your webhook URL - Paste the Langflow webhook URL into the appropriate field. This tells the service where to send the data.
-
Define the trigger event - Specify the event that should trigger the webhook. For example, "New Email Received" or "Order Complete." Here’s an example from Composio:
 Test the webhook - Send a test event from the external service to verify that the webhook is correctly configured. Check Langflow to see if the data has been received.
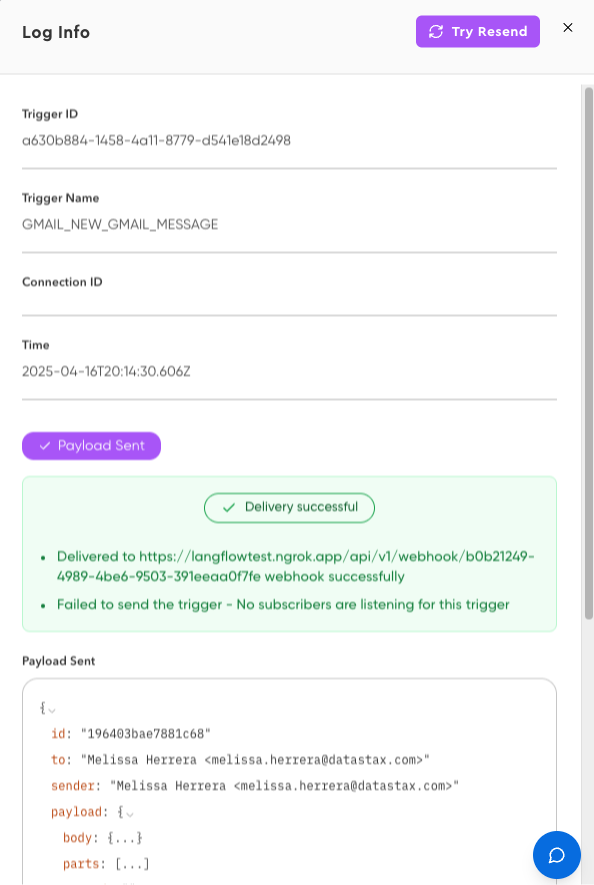
Inspect your webhook component in Langflow once more. Your payload from external services will look more like this. A lot more information and metadata than our initial example, but actual data from the “real-world” that can be used in the rest of your Langflow workflow.

Conclusion and next steps
And there you have it—a quick dive into webhooks in Langflow! We started with a simple example and ventured into real-world applications. Now, you're ready to harness the power of webhooks in your Langflow projects.
If you have questions or want to dive deeper, join the conversation on Discord. Happy coding! 🚀
Feel free to explore and experiment with these components. The possibilities are endless! 🌐🔧
References: